Table of Contents
The Forms and Process Designer features help your users create intelligent forms to capture lead data that’s relevant to their departments, products, or processes.
You can customize forms to behave in ways specific to your use cases, and prompt users to collect the right information based on a lead’s previous inputs.
Once you’ve created a form, the Process Designer helps you choose where, and to which users you want the form to appear. You can also use it to combine multiple forms into processes.
See How to Create a Process.
Some key features include –
You must be an administrator user to create and edit forms.
These examples illustrate different functionalities you can use, and outcomes you can achieve using the forms and process designer features.
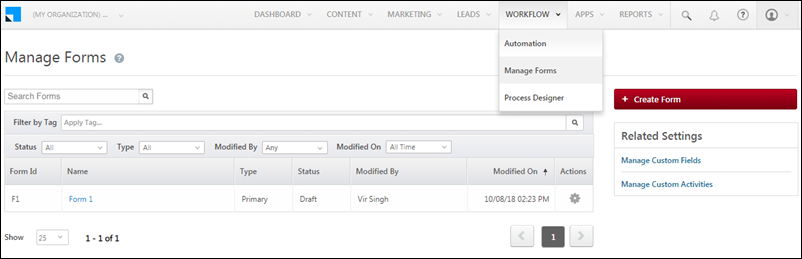
To access the Manage Forms page, navigate to Workflow>Manage Forms.
All forms you create will appear on the grid. You can search for a form, filter by tags, and even filter on the basis of status, type, modified by and modified on dates. The settings icon under the Actions column allows you to edit, delete, add tag, clone, rename or publish a form and test a published form.
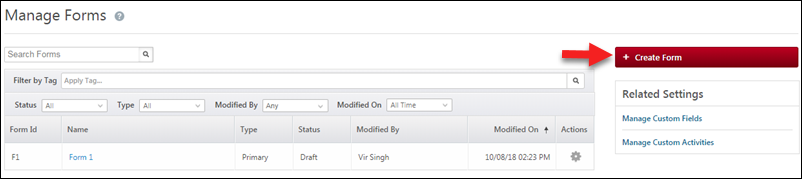
Click the Create Form button to create a new form.
On the Create Form pop-up –
Alternatively, you could click the Create with default options link at the bottom to create a form with only lead fields.
Note: If you want to use Custom Fields Sets (to upload documents), select the activity where the custom field set has been set up.
Now choose the type of form you want to create –
Click Next, when you’re done.
Now choose how you want your form to flow. Choose between –
Then click Create.
The form editor lets you design your form, configure properties, create rules, save and finally publish to live.
To change the form name, click the edit icon alongside the form name at the top of the form editor.

You can change some of the form properties you selected in the previous steps in the form settings menu. Click the wheelicon to open the settings menu.

Add/remove lead and activity fields, adjust the placement of the labels and add tags that you can later filter your forms by.
Click the Additional Settings tab for more options. You can change the form to multi-step and even track the location where the form is being filled on the LeadSquared mobile app.
This section details how to create and configure the tabs, sections and fields in your form.
Adjust Form Properties
Change the Tab Name
Click on a tab to change the display name using the tab properties panel on the right side of the page.
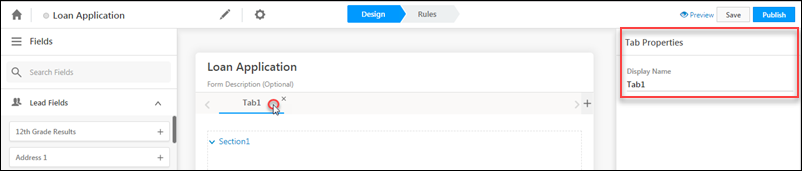
Click the Add button highlighted below to add a new tab to the form.

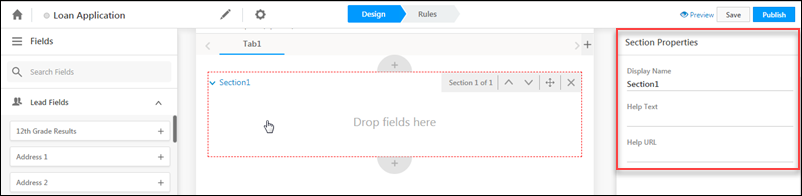
Adjust Section Properties and Add/Remove Sections
Click a section to edit the section properties using the pane on the right of your screen. You can edit the section’s display name, add help text and a help URL. You can also add/remove and re-order sections using the buttons that appear.
Add Fields to a Section
Lead, activity and special fields show up on the left pane. You can add fields to a section by simply dragging the field from the left pane and dropping it into a section. Alternatively, you can use the add button alongside each field. You can search for a particular field or simply scroll down to locate it.
Once you’ve added fields to a section, drag and drop them to re-order, expand or collapse. Click the cancel icon to remove a field from a section.
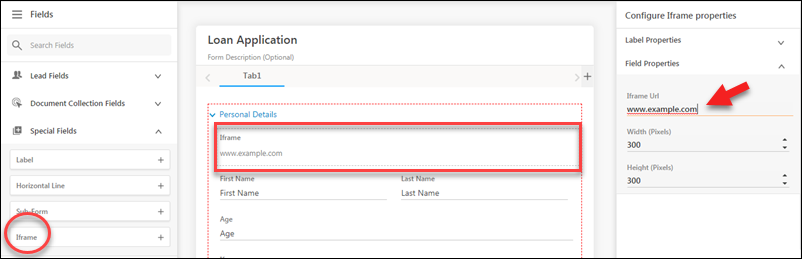
Special Fields
Using special fields you can add –
Drag and drop a special field into a section, then click on the field to configure its properties on the right pane.
In the example below we’ve added an Iframe to render some URL on the form.
Adjust Field Properties
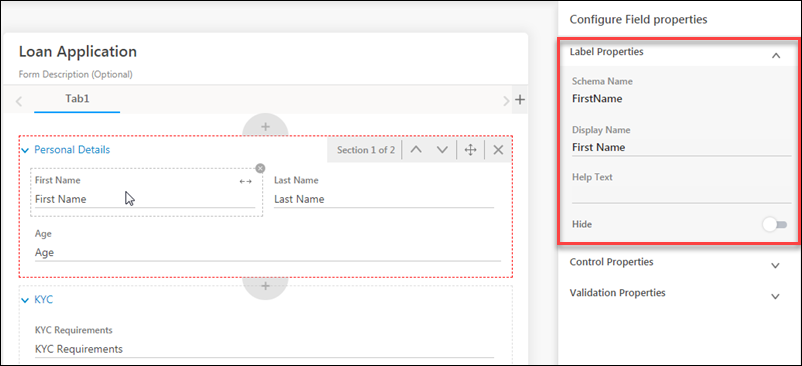
When you click on a field you’ve added to a section, the field properties will become editable on the right pane. There are 3 sets of properties you can edit – label, control and validation properties.
Label properties allow you to change the field’s display name, add help text and hide/show the field label.
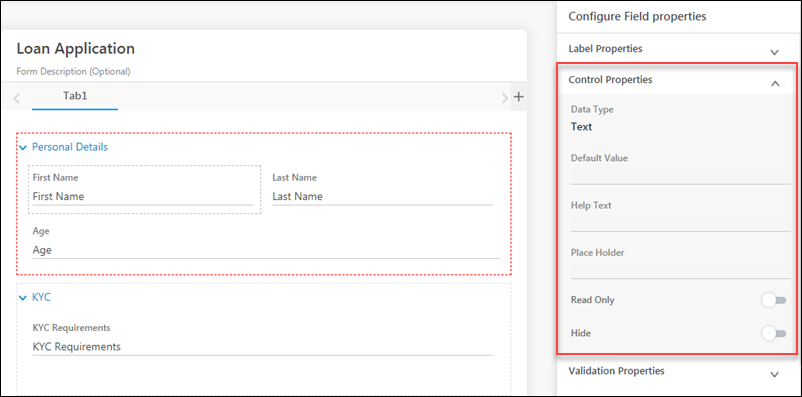
Click Control Properties to enter a default value for a field, add help text, add placeholder text, render the field as read-only and hide/show the field.
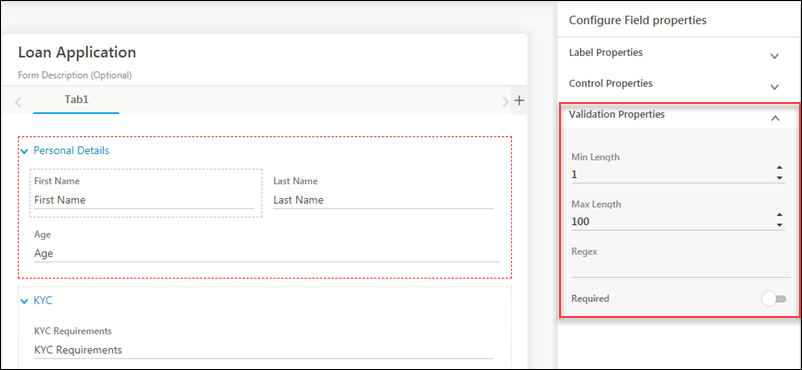
Click Validation Properties for field validation configurations like minimum and maximum length, regex and setting the field as required or mandatory.
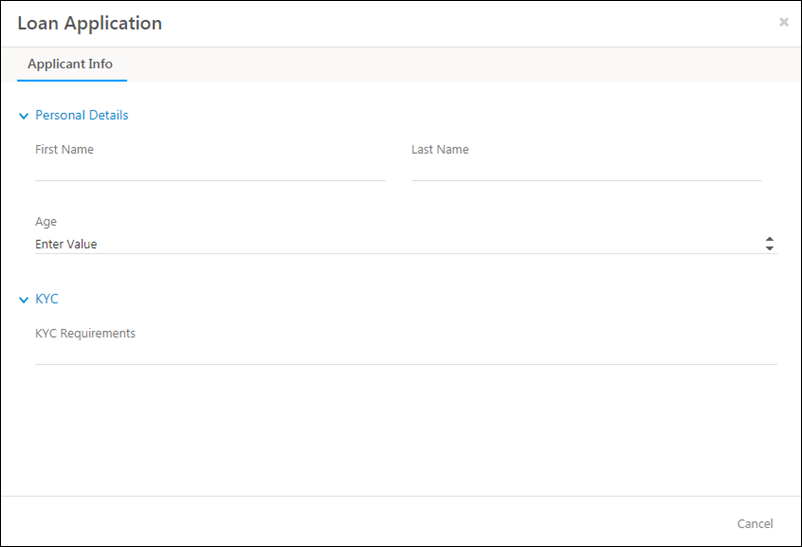
Preview the Form
It’s always good practice to keep previewing your form as you build it. The preview option is available on the right side of the top menu of the page.

Create a Sub-Form
You can create a sub-form from the form creation wizard.
Or directly from the form editor.
On the right pane, select an existing form from the drop-down or click Create New.
A sub-form editor will open in a new tab in your browser. Create the sub-form the same way you created your primary form. Click Publish when you’re done.
Rules let you configure the behaviour of your form. You can show/hide and set values for fields based on certain conditions. You can also show/hide tabs, sections and sub-forms.
Here are some common use cases you can tackle using rules –
Note: You can also set conditions on multiple fields. For example, if ‘Gender’ is ‘Male’ and ‘Age Group’ is ‘Adult’ then show a ‘Men’s Clothing Preferences’ sub-form to capture clothing preferences.
To create a rule click the Rules tab on the top menu. Then click Add Rule.

You can set multiple conditions and multiple action per rule by clicking the add icon. You can add multiple rules as well by clicking the Add Rule button. Be sure to select if you want the action to proceed if all rules are met or if any 1 rule is met.

Use the fields provided to set up your conditions and actions. If you’re using the action Set Value, you can set the value of a field –

Your form auto-saves as you create it but you can also click Save manually. When you’re satisfied with the design and rules of your form, click Publish.

On publishing a form, you can either go back to list of forms on the Manage Forms page or directly to creating a process through the Process Designer.
Once you’ve published your forms, the process designer will help you integrate them into your workflows, chain them together to create processes, show them to specific users and do lots more. See How to Create a Process.
If you have any questions related to forms that weren’t answered here, please leave comments below. We’ll be happy to help!
You can customize forms to behave in ways specific to your use cases, and prompt users to collect the right information based on a lead’s previous inputs.
Once you’ve created a form, the Process Designer helps you choose where, and to which users you want the form to appear. You can also use it to combine multiple forms into processes.
See How to Create a Process.
Feature Overview #
Some key features include –
- The ability to capture both lead and activity fields in the same form.
- Single-step and multi-step forms.
- Customizable sections, tabs, sub-forms and fields.
- Ability to configure rules to –
- Show/hide sections/tabs/sub-forms and fields
- Display values based on conditions and previous inputs.
Prerequisites #
You must be an administrator user to create and edit forms.
Example Use Cases #
These examples illustrate different functionalities you can use, and outcomes you can achieve using the forms and process designer features.
| Finance |
|
| Education |
|
| Real Estate |
|
| Others | Collect vendor information through customized forms. Show/hide fields, sub-forms, tabs based on vendor services. For example –
|
Manage Forms #
To access the Manage Forms page, navigate to Workflow>Manage Forms.
All forms you create will appear on the grid. You can search for a form, filter by tags, and even filter on the basis of status, type, modified by and modified on dates. The settings
Create a Form #
Click the Create Form button to create a new form.
Form Settings
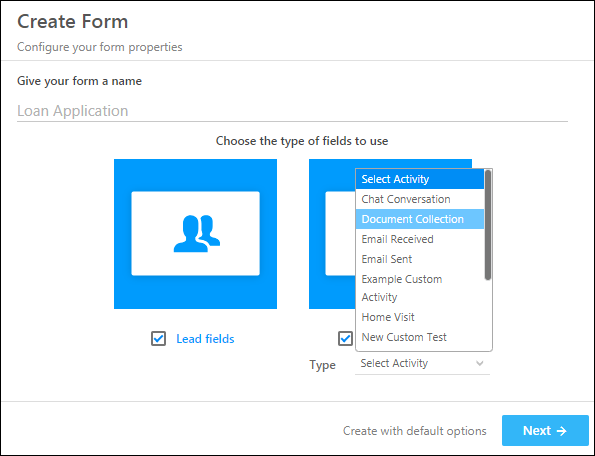
On the Create Form pop-up –
- First give your form a name.
- Then choose whether you want the form to contain lead fields, activity fields or both. If you choose to include activity fields, you must select an activity type.
- Click Next
Alternatively, you could click the Create with default options link at the bottom to create a form with only lead fields.
Note: If you want to use Custom Fields Sets (to upload documents), select the activity where the custom field set has been set up.
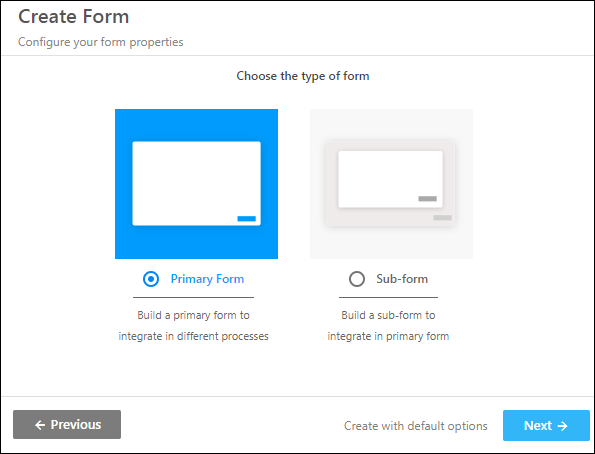
Now choose the type of form you want to create –
- Primary Form – This is the main form that will appear on the Manage Forms grid. You can use the Process Designer to combine primary forms into processes.
- Sub Form – A sub-form can be integrated into a primary form. It will not show up on the Manage Forms grid.
Click Next, when you’re done.
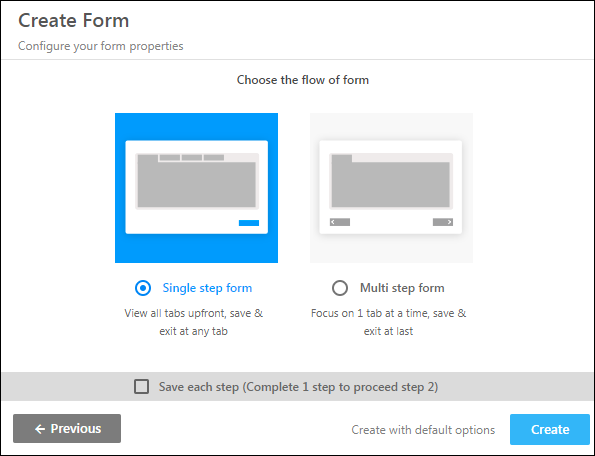
Now choose how you want your form to flow. Choose between –
- Single step form – All tabs will be visible upfront. You can switch between tabs, and save & exit while on any tab.
- Multi step form – Users will only see one tab at a time. You can only save and exit the form at the last step.
Then click Create.
Rename Your Form and Changing the Settings
The form editor lets you design your form, configure properties, create rules, save and finally publish to live.
To change the form name, click the edit
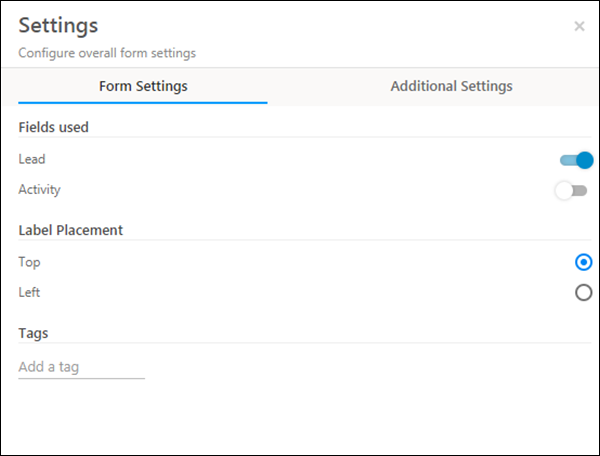
You can change some of the form properties you selected in the previous steps in the form settings menu. Click the wheel
Add/remove lead and activity fields, adjust the placement of the labels and add tags that you can later filter your forms by.
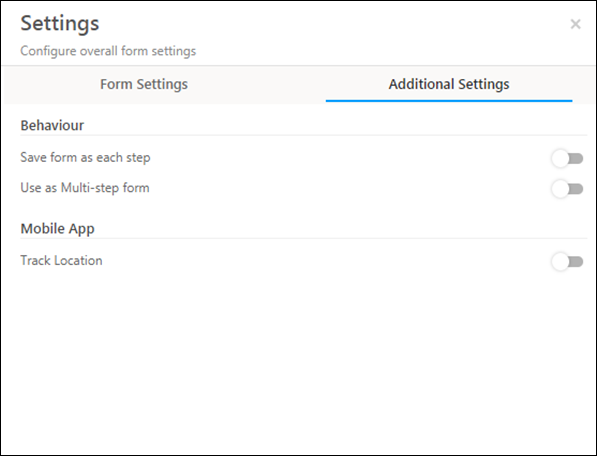
Click the Additional Settings tab for more options. You can change the form to multi-step and even track the location where the form is being filled on the LeadSquared mobile app.
Design Your Form
This section details how to create and configure the tabs, sections and fields in your form.
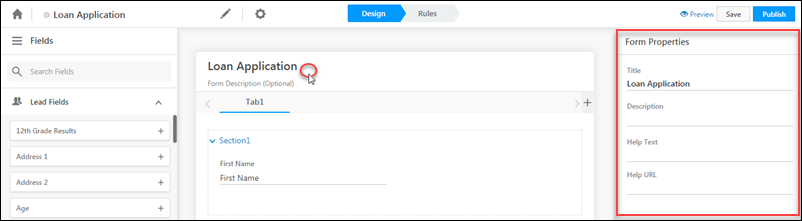
Adjust Form Properties
- Click the top section of your form.
- You can adjust the form properties on the right pane. These include the form title, description help text and even a help URL you can direct users to.
Change the Tab Name
Click on a tab to change the display name using the tab properties panel on the right side of the page.
Click the Add button highlighted below to add a new tab to the form.
Adjust Section Properties and Add/Remove Sections
Click a section to edit the section properties using the pane on the right of your screen. You can edit the section’s display name, add help text and a help URL. You can also add/remove and re-order sections using the buttons that appear.
Add Fields to a Section
Lead, activity and special fields show up on the left pane. You can add fields to a section by simply dragging the field from the left pane and dropping it into a section. Alternatively, you can use the add button alongside each field. You can search for a particular field or simply scroll down to locate it.
Once you’ve added fields to a section, drag and drop them to re-order, expand or collapse. Click the cancel icon to remove a field from a section.
Special Fields
Using special fields you can add –
- Labels
- Horizontal lines
- Sub-forms
- Iframes
Drag and drop a special field into a section, then click on the field to configure its properties on the right pane.
In the example below we’ve added an Iframe to render some URL on the form.
Adjust Field Properties
When you click on a field you’ve added to a section, the field properties will become editable on the right pane. There are 3 sets of properties you can edit – label, control and validation properties.
Label properties allow you to change the field’s display name, add help text and hide/show the field label.
Click Control Properties to enter a default value for a field, add help text, add placeholder text, render the field as read-only and hide/show the field.
Click Validation Properties for field validation configurations like minimum and maximum length, regex and setting the field as required or mandatory.
Preview the Form
It’s always good practice to keep previewing your form as you build it. The preview option is available on the right side of the top menu of the page.
Create a Sub-Form
#
You can create a sub-form from the form creation wizard.
Or directly from the form editor.
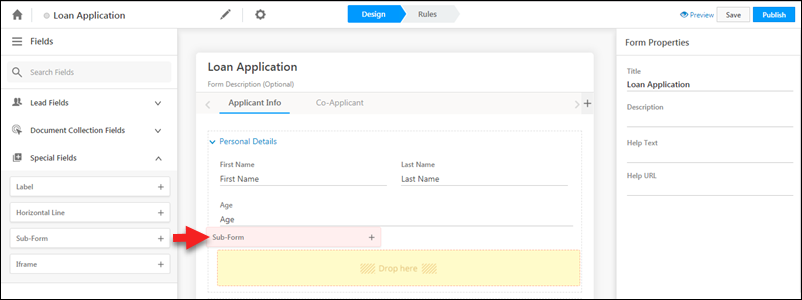
- On the left pane, click Special Fields.
- Next, drag the Sub-Form special field into the appropriate section in your form.
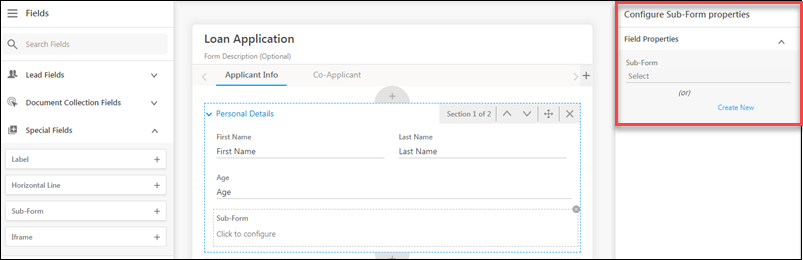
On the right pane, select an existing form from the drop-down or click Create New.
A sub-form editor will open in a new tab in your browser. Create the sub-form the same way you created your primary form. Click Publish when you’re done.
Create Rules #
Rules let you configure the behaviour of your form. You can show/hide and set values for fields based on certain conditions. You can also show/hide tabs, sections and sub-forms.
Here are some common use cases you can tackle using rules –
| Capture Multiple Addresses |
|
| Capture Co-Applicant information |
|
Note: You can also set conditions on multiple fields. For example, if ‘Gender’ is ‘Male’ and ‘Age Group’ is ‘Adult’ then show a ‘Men’s Clothing Preferences’ sub-form to capture clothing preferences.
To create a rule click the Rules tab on the top menu. Then click Add Rule.
You can set multiple conditions and multiple action per rule by clicking the add
Use the fields provided to set up your conditions and actions. If you’re using the action Set Value, you can set the value of a field –
- Through API data
- Mail Merge lead/activity fields
- Perform calculations on numeric fields
Save and Publish #
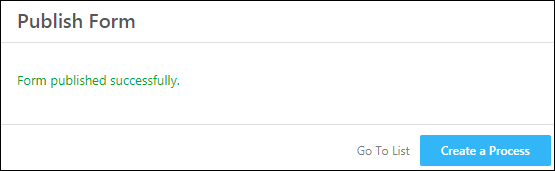
Your form auto-saves as you create it but you can also click Save manually. When you’re satisfied with the design and rules of your form, click Publish.
On publishing a form, you can either go back to list of forms on the Manage Forms page or directly to creating a process through the Process Designer.
Process Designer #
Once you’ve published your forms, the process designer will help you integrate them into your workflows, chain them together to create processes, show them to specific users and do lots more. See How to Create a Process.
Any Questions? #
If you have any questions related to forms that weren’t answered here, please leave comments below. We’ll be happy to help!


